Showing posts with label feathers. Show all posts

Tuesday, February 18, 2014

Butterfly quilt, a new way to applique


Miss Abagail loves purple and butterflies.  The quilt was quilted first without the butterflies appliqued on to it.  That kept the feathers pattern going under the feathers instead of along side of them.  It also made it easier to quilt.   After the intertwining feathers were quilted, the butterflies were fused onto the top.  The bottom one hangs over the edge of the binding and is backed with regular fabric.  The bottom half is not stitched down.  The other butterflies go from big to small as they go to the top of the quilt.  The top butterflies are cut out of a fabric print.  Quilting was also used to decorate the butterfly wings.

The small purple border was taken from the backing fabric.  After the quilt was squared up, the backing fabric cut off was used for the binding.

Sunday, January 26, 2014

Blue Delph Quilt

Yeah, finished quilting, forty six hours on a longarm and lots of time thinking and drawing.  The idea was to merge the design of the quilt top and the quilting into one design.  In person the quilting shows up so well, but the lighting for the photo didn't show it off well.   It took 46 hours to quilt on the longarm with 3 1/2 hours of ripping for one motif that was not centered correctly.  It was the last marked and quilted.


Thursday, November 14, 2013

A border idea and Shirley's vest

I quilted a quilt with a wide top and bottom border and narrow side borders  The overall look was Oriental and the blocks had dragons fussy cut.   I chose to do the feather on the outer border utilizing only part of the top and bottom border making the one side very irregular with the feathers.  Then I  filled in the rest of the border with clam shells that a friend called "dragon's scales".


Shirley's vest is finished and ready for her Birthday delivery.  The silver thread on a black denim looking fabric is stunning.

Thursday, October 3, 2013

Jane's quilt is done, well quilted

Jane's quilt is gigantic, 115" by about 85".  The quilting seems even across the whole quilt and it lays very flat.  It took 12 hours to quilt.  I couldn't get a photo of the whole quilt but the small view gives a good view of the quilting.


Sunday, September 29, 2013

Connecting Up Feathers in borders


How to get the angle of feathers so you can have a continuous feather border.


I had to do  ovals of feathers and the connecting of the feathers would show up if not perfect.


I do borders all the time that go around the quilt and connect them up so sometimes they are perfect and sometimes not.  So I set out to figure out how to do it consistently 

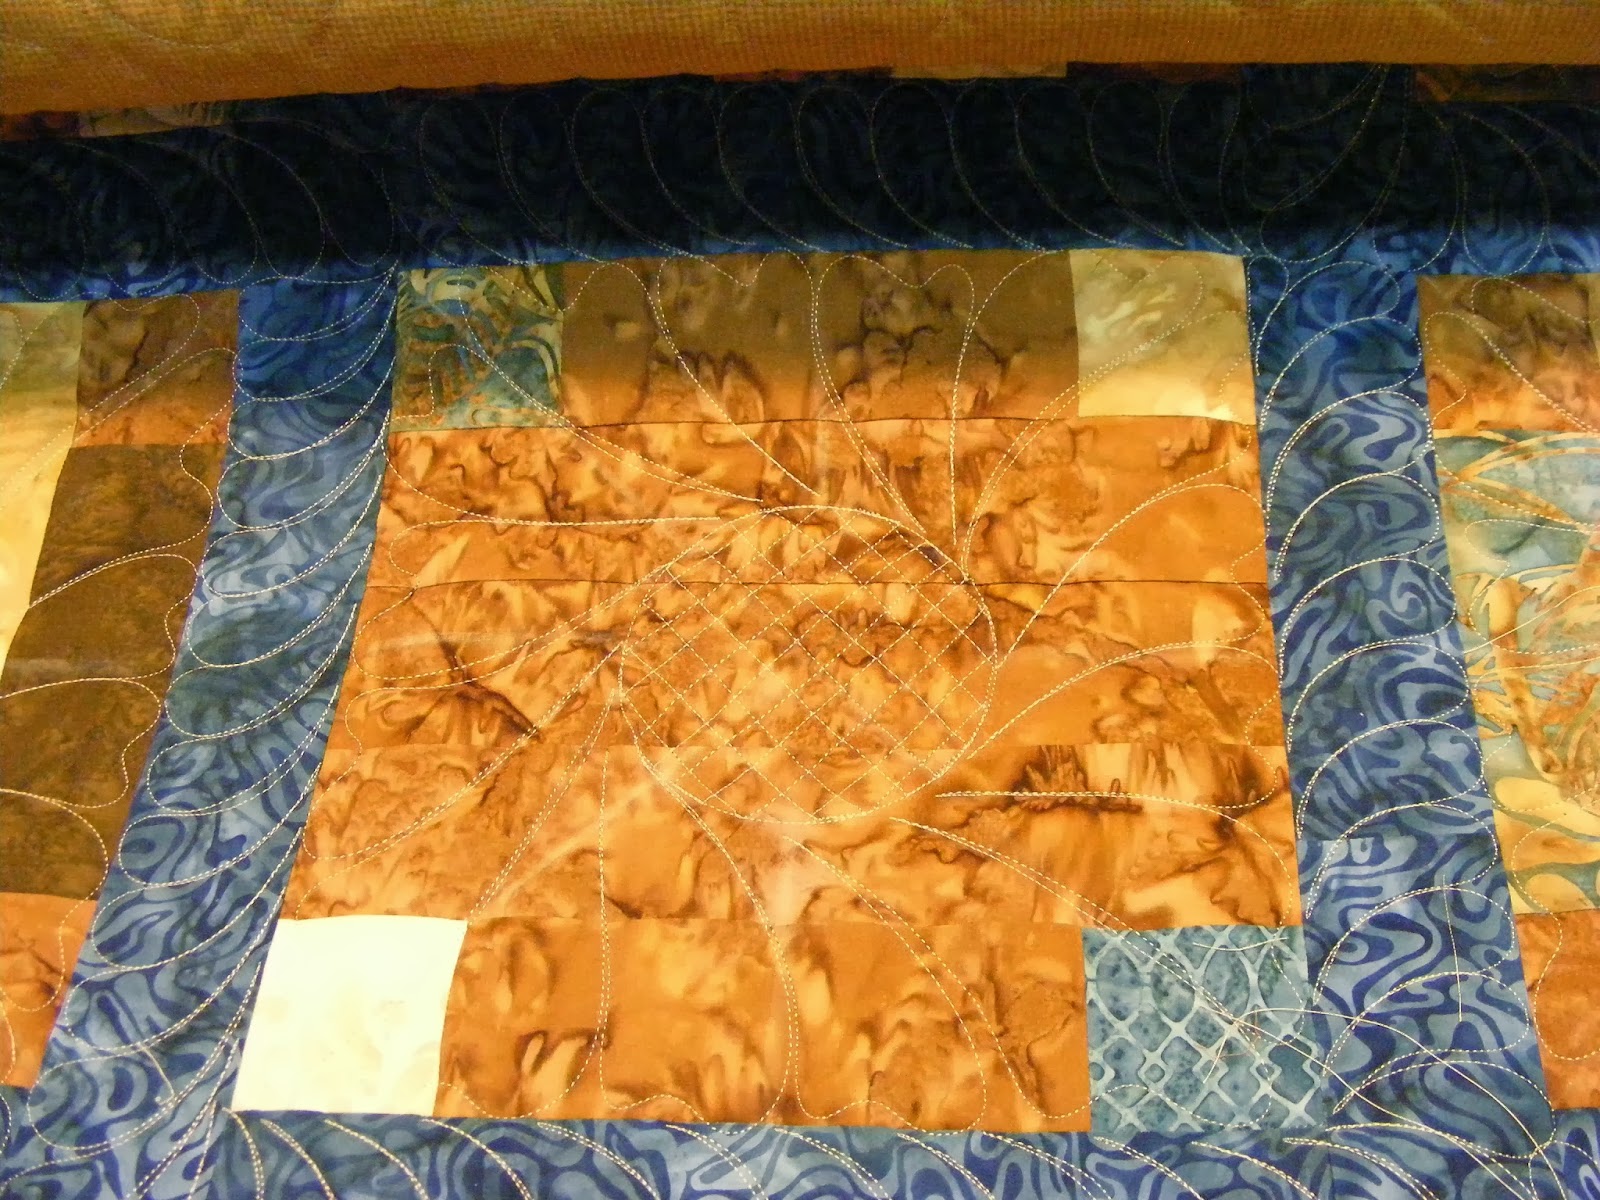
My thought was that I know the angle of my feathers is 45 degrees so why not mark that angle with chalk.  Of course my line is not straight it is a curve.  At the point where I want to start my feather, I put a line straight across the line of the stem no matter what angle it is at.  I want 90 degree angles


 You can see just below the feathers a chalk line forming 90 degree angles on the stem.  In the first feather on each side of the stem you can see the 45 degree line I made by dividing that 90 degree line in half  On the right side of the photo in the blue you can see a chalked line 90 degrees to the seam.  The seam was used as if it was the stem.  Again you can see the chalk mark in that first feather at the 45 degree angle..


The next photo shows a section where the feathers have been joined.  Can you find the join?  I'm not sure myself.

Thursday, September 19, 2013

The DWR is quilted


The stop watch says a little over 27 hours to quilt  I did forget to turn it on a couple of times.  I used 21 class M bobbins with very fine Glide thread.    The greatest amount of time was the procrastinating before  putting it on the machine to quilt.

My goals in quilting:  I wanted the quilting on the rings to show that they intertwined and I wanted the birds to puff.  


To that end, I thought maybe feathered rings, one clockwise and the next, counterclockwise would do it.  But yes it was a challenge to keep clockwise and counterclockwise straight especially on the ends of the quilt on the partial rings.  I chalked C and CO in the blocks to help me.   The first row took 5 hours to quilt setting up the pattern of the rings.   I understand now why the DWR's that I see don't even quilt the rings letting them puff or do a simple non intertwining pattern.  The bulk in the seams can be a problem.  I was very careful when ironing my seams to spread out the bulk as much as possible.                                                  


McTavishing would make the background flat to puff the birds.  But I have been doing that for about 8 years so I included feathers and spirals in the McTavishing to give it my own signature.  


The quilt top was a challenge to piece, my first curved pieced quilt.  I did a tablerunner to try it to see if I could even piece this top.  Then it was used to test the quilting.  Now  I have to learn to bind that irregular outside edge.  The tablerunner will be the trial for that too. 

 The color on the photo below is a little more true.